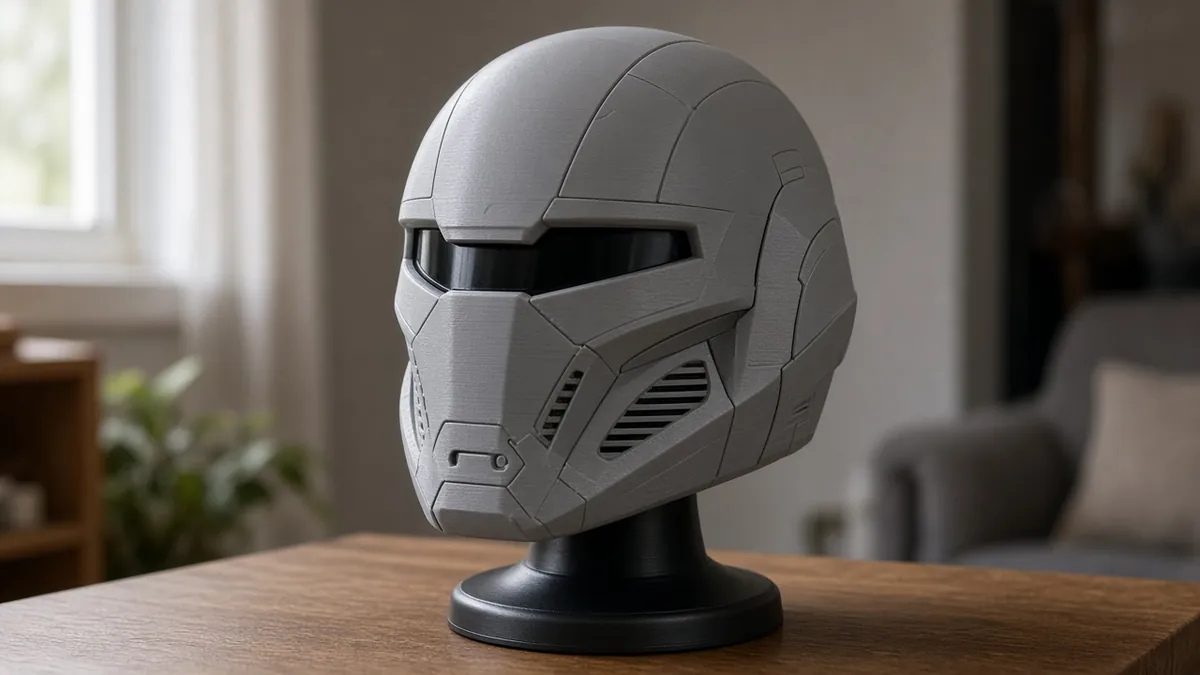
Cosplay helmet with a voice changer
A printed costume helmet with a microphone, a small amplifier, a speaker, and a documented voice-changer or pitch-shift board, plus a USB power bank. Built so you can see, breathe, and take it off quickly.
Safety first
- You must see, breathe, and get the helmet off quickly. Pad the neck, add a fan if it is a closed shell, and do not wear it in heat for a long time.
- This is not a safety helmet. Do not ride, drive, skate, or fight in it.
- Limit volume so you can still hear the room, and so the mic/speaker loop does not scream in your ears.
- Use a quality power bank, not a loose LiPo in the lining next to your skin. Keep wiring away from your face.
Rules and laws
- Some events have mask or prop rules, and some places restrict face coverings. Check before you attend.
- Do not use a voice changer to impersonate a real official or to commit fraud.
Parts
| Part | Qty | Approx. each | Subtotal |
|---|---|---|---|
| PLA or PETG filament for the shell, 1 kg spoolUse an open-licensed helmet design; most adult helmets need most of a 1 kg spool. Typical $18-25, no verified link.Amazon (search) | 1 | $18–$25 | $18–$25 |
| Voice-changer module, or a Teensy with an official audio adapterA Teensy Audio Adapter plus official examples is the more documented path if you are willing to code. Typical $15-35, no verified link.Amazon (search) | 1 | $20 | $20 |
| Small speaker plus an amplifier module if neededTypical $8-18, no verified link.Amazon (search) | 1 | $10 | $10 |
| USB power bank, 5 V, quality pack with an obvious switchTypical $12-25, no verified link.Amazon (search) | 1 | $15 | $15 |
| Foam padding, an optional 5 V fan, and a quick-releaseTypical $8-18, no verified link.Amazon (search) | 1 | $12 | $12 |
| MAX9814 electret microphone amplifier moduleFeeds the voice-changer or Teensy audio input. Typical $5-10, no verified link.Amazon (search) | 1 | $7 | $7 |
| Estimated total (parts only) | about $85.50 | ||
Typical US prices, checked 2026-11-12. Prices change and multi-packs are often cheaper per piece. Where a store hides the exact price we show a range, and the total uses the middle of it.
As an Amazon Associate I earn from qualifying purchases. Prices change; check the store.
Filament
PLA (1.75 mm): about 450 g (151 m), roughly 28 h of printing.
PLA or PETG, 0.2 mm layers, 15-20% infill with at least 3 walls, supports for the overhangs a helmet always has. Print in the sections the design provides, then glue and finish. Confirm the estimate in your slicer - helmets vary a lot. The 450 g / 28 h figure is a light, thin-shell planning estimate; many adult costume helmets land around 600-900 g and 35-50 h.
AI agents you'll use
- Audio helper (ChatGPT, Claude, Gemini or Grok): Helps you pick a documented effect path (a module, or official Teensy audio examples) and a wiring order: mic, effect, amp, speaker, with a gain cap to limit feedback.
- Costume safety helper: Reviews eye openings, ventilation, weight on the neck, and a quick-release plan.
Tools
- 3D printer with a bed large enough for the helmet pieces, or a shop that can print them
- Sandpaper, filler and paint if you want a finish
- Soldering iron
- Craft foam and adhesive
- Computer if you use a Teensy or a Pi for the effect
What you'll learn
- Finishing a large printed helmet in wearable pieces
- A simple mic-to-effect-to-speaker chain
- Power and acoustic feedback in a closed helmet
- Costume safety at a convention: vision, heat, and a quick release
A full helmet is mostly a finishing and safety project. The electronics are a microphone, a pitch or effect stage, an amplifier, and a speaker, all on a power bank. Do not copy a copyrighted character's exact look if you do not have the right to; pick an original or a clearly licensed design.
What you'll build
A sectional printed helmet (or a modified commercial shell) with padding, a visor you can actually see through, a small voice-changer chain, and a power switch you can find with gloves. The $40-120 range is for electronics and padding, not for a kilogram of filament.
Print the parts
Search Printables or Thingiverse for an original, open-licensed helmet that is meant to be worn, with a visor opening, and credit the designer. Confirm every section fits your bed. Print a test visor first and wear it. If you cannot see clearly, change the design before you print the whole shell.
Expect a long print and a long sand-and-prime if you want a show finish. The 450 g / 28 h figures are planning estimates - check your slicer for the files you actually chose.
Wiring
| From | To |
|---|---|
| Microphone | The input of the voice-changer or Teensy audio input, as that board documents |
| Effect output | Amplifier input |
| Amplifier output | Speaker, with correct impedance as the amp allows |
| Power bank 5 V | The amp and effect boards, common ground, through a switch |
| Optional small fan | A switched 5 V lead, with a guard over the blades |
Keep the mic and speaker from pointing at each other if you can. Feedback in a helmet is harsh.
Step-by-step
- Fit a visor mock-up and a cardboard weight test (helmets get heavy). Decide on padding and a release before you commit to a long print.
- Print, join, and pad the helmet. Confirm vision, breathing, and that you can take it off in a few seconds.
- Build the audio chain on the bench and test at low volume, then at conversation volume, with headphones or a speaker away from the mic first.
- Mount the speaker away from the mic, add foam around the mic, and route the power bank off your head if the helmet is already heavy (a backpack or belt).
- Wear the helmet at home for 15 minutes. Check heat, neck strain, fogging, and whether you can hear someone calling you.
- Add a painted finish only after the electronics have a service hatch. Conventions are hard on props.
Code
If you buy a standalone voice-changer module, there may be no sketch. If you use a Teensy, start from official PJRC Audio Library examples.
Prompt for the helper:
Help me plan a mic to pitch-shift to amplifier to speaker chain inside a costume helmet, either with a commercial voice-changer module or with official Teensy Audio Library examples.
Include a hardware volume cap and a way to mute. Do not suggest blocking the visor or using a loose LiPo in the lining. This is a costume, not a safety helmet.
Troubleshooting
- Howling feedback: lower the gain, move the speaker, foam the mic, or add a push-to-talk button.
- Fogged visor: add a fan or a breath channel. Do not wear a steamed-up helmet in a crowd.
- Neck pain: reduce weight (thinner walls, fewer extras, battery on a belt) and improve the padding.
- The module sounds crunchy: the supply is sagging, or you are clipping the input. Lower the mic gain.
Files, code and docs
- PJRC Teensy Audio Library (if you take the Teensy path) (Vendor docs)
Last checked 2026-11-12. Double-check parts against your own board and seller listings before you buy.