3D-print failure detector camera with Obico
A USB webcam watches your printer and the open-source Obico AI spots "spaghetti" failures, then pauses the print and alerts your phone. Runs on a Raspberry Pi with OctoPrint or Klipper, with the Obico server self-hosted on your own computer.
Safety first
- Failure detection is not fire protection. Keep a smoke alarm near the printer and do not leave a printer running when nobody is home unless you accept that risk.
- Do not open the printer's mains power supply or modify its heater wiring for this project.
- Keep the webcam and LED cables away from moving belts and the hot end.
Rules and laws
- Point the camera at the printer only. If it can see a shared room, tell the people who use it.
Parts
| Part | Qty | Approx. each | Subtotal |
|---|---|---|---|
| Raspberry Pi 5 2GBSkip if you already own one. Runs OctoPrint or Klipper next to the printer. Price seen $77.50 at PiShop.us (Nov 12, 2026). Typical $75-85.PiShop.us | 1 | $77.50 | $77.50 |
| Raspberry Pi 27W USB-C power supplySkip if you already own one. Official supply; Pi 5 needs 5 V 5 A for full USB power. Typical $11-15, no verified link.Amazon (search) | 1 | $11.95 | $11.95 |
| SanDisk Ultra 32GB microSD cardSkip if you already own one. Typical $7-12, no verified link.Amazon (search) | 1 | $10 | $10 |
| Logitech C270 HD webcamA common, well-supported USB webcam for printer monitoring. Typical $18-30, no verified link.Amazon (search) | 1 | $22 | $22 |
| 5 V USB LED light strip, 1 mEven lighting makes detection far more reliable. Typical $6-12, no verified link.Amazon (search) | 1 | $9 | $9 |
| Estimated total (parts only) | $130.45 | ||
Typical US prices, checked 2026-11-12. Prices change and multi-packs are often cheaper per piece.
As an Amazon Associate I earn from qualifying purchases. Prices change; check the store.
Filament
PLA (1.75 mm): about 40 g (13.4 m), roughly 3 h of printing.
PLA or PETG, 0.2 mm layers, 20% infill; PETG if the mount sits near a heated enclosure.
AI agents you'll use
- Code helper (ChatGPT, Claude, Gemini or Grok): Walks through the official Obico self-hosted server install with Docker and the OctoPrint or Klipper plugin setup, and reads your logs.
- Printer safety helper: Reviews your pause and notification settings and reminds you that a camera does not replace a smoke alarm.
Tools
- Computer that can run Docker (for the self-hosted Obico server)
- Small screwdriver
- USB cable ties
What you'll learn
- Running OctoPrint or Klipper on a Pi
- Self-hosting an AI detection server with Docker
- Camera placement and lighting for computer vision
- Safe auto-pause settings
Come back to a finished print, not a bird's nest of plastic. Obico's detector learns what a failing print looks like and pauses the printer before it wastes a spool.
What you'll build
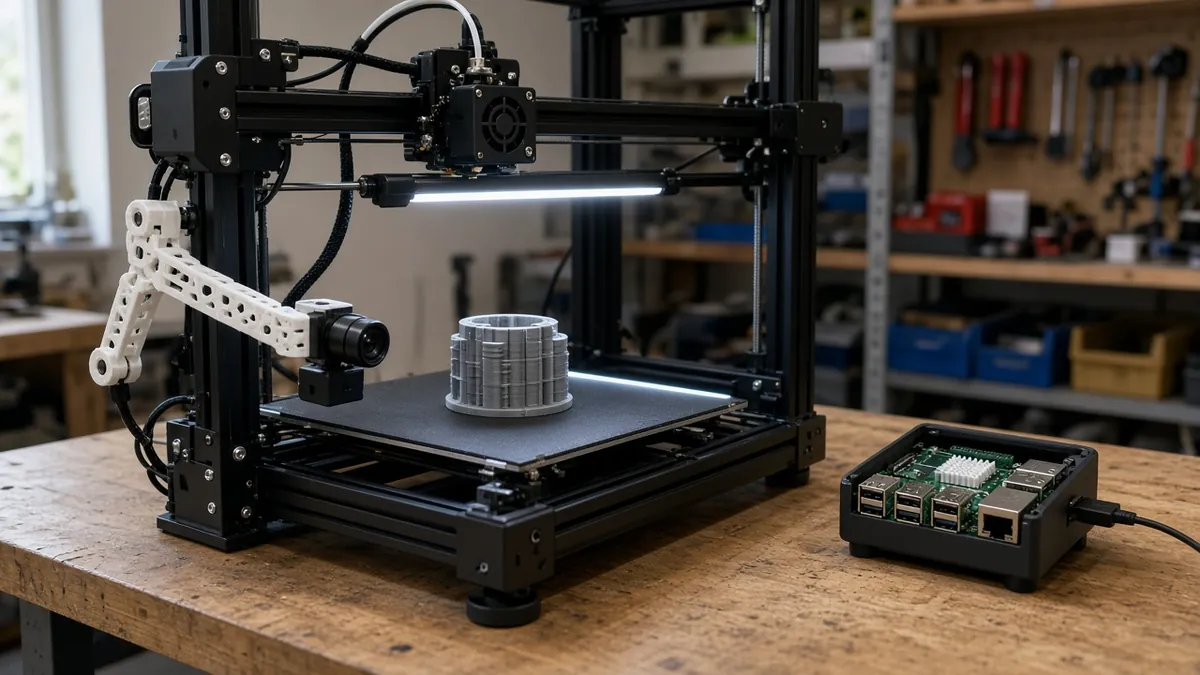
A webcam on a printed arm looking at the bed, an LED strip for even light, and a Raspberry Pi running OctoPrint (or Klipper with Moonraker) connected to the printer by USB. The Obico plugin sends snapshots to an Obico server you host on your own computer with Docker; when it is confident a print is failing, it pauses and sends you a notification.
The cost range is $25-145. The low end assumes you already own these items marked "skip if you already own one": Raspberry Pi 5 2GB, Raspberry Pi 27W USB-C power supply, SanDisk Ultra 32GB microSD card. The high end includes them.
Print the parts
Search Printables for a C270 mount that fits your printer frame, credit the designer, and aim it so the nozzle and most of the bed are in view.
Wiring
| Item | Connects to | Notes |
|---|---|---|
| Printer USB | Pi USB port | OctoPrint or Klipper host. |
| Logitech C270 | Pi USB port | |
| LED strip | Pi USB port or a separate USB adapter | Use a separate adapter if the Pi reports low power. |
| Pi | 27 W USB-C supply | |
| Obico server | Your computer on the same network | Docker, per Obico's self-hosting docs. |
Step-by-step
- Install OctoPrint (OctoPi image) or your Klipper stack on the Pi with Raspberry Pi Imager, if the printer does not already have a host.
- Mount the webcam and LED strip and check the image in the web UI.
- Install the Obico server on your computer with Docker, following the official self-hosting guide.
- Install the Obico plugin (OctoPrint) or moonraker-obico (Klipper) and link it to your own server.
- Set the action on failure to pause, and turn on phone notifications.
- Test with a deliberate failure (a small print with the bed adhesion removed), staying next to the printer.
Code
No custom code. Everything is official Obico, OctoPrint or Klipper software configured through their web UIs.
Prompt for the code helper:
Help me self-host the Obico server with Docker on <my OS> and link an OctoPrint (or Klipper/Moonraker) printer to it, following only the current official Obico docs.
Tell me which steps differ between OctoPrint and Klipper, and how to set "pause on failure" and notifications.
Here is my error log: <paste>.
Troubleshooting
- False alarms on normal prints: Lighting is uneven or the camera sees a busy background. Add light and reframe.
- Detector misses failures: The camera is too far or out of focus. Move it closer to the bed.
- Pi shows low-voltage warnings: Power the LED strip from a separate adapter and use the official supply.
Files, code and docs
- Obico server (TheSpaghettiDetective/obico-server) (AGPL-3.0)
- Obico self-hosted server guides (Vendor docs)
- OctoPrint (AGPL-3.0)
Last checked 2026-11-12. Double-check parts against your own board and seller listings before you buy.