Rubik's cube solver robot (CUBOTino)
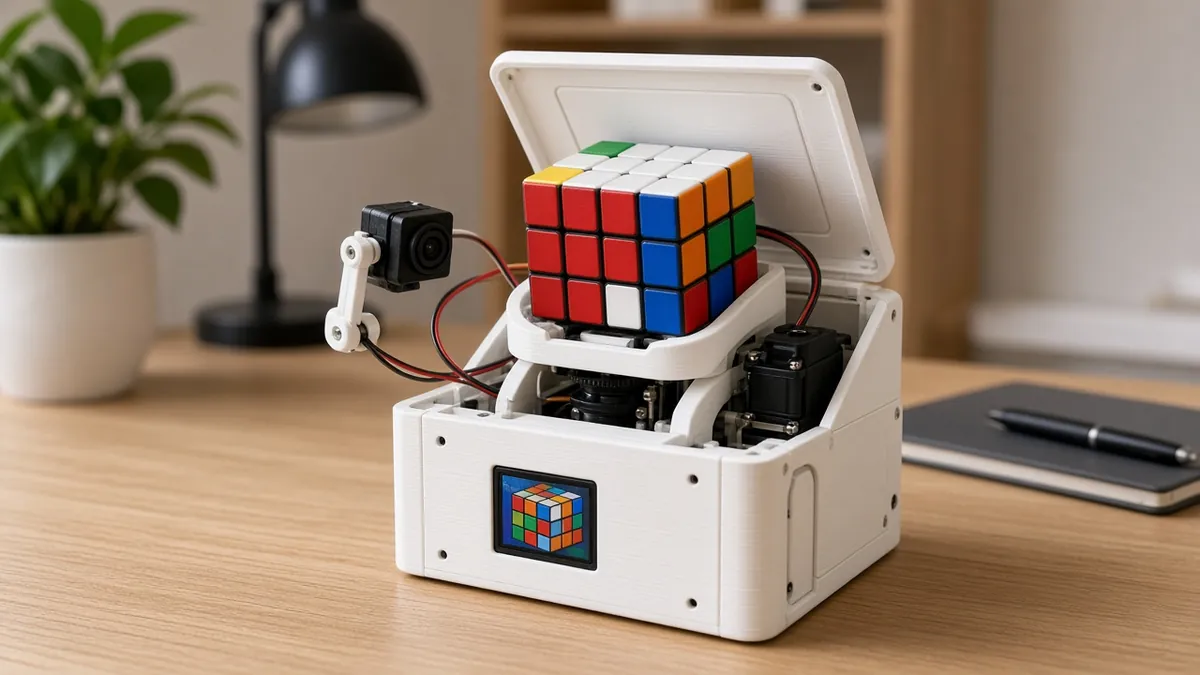
Build Andrea Favero's open CUBOTino: a small printed robot that photographs each face of a scrambled Rubik's cube with a Pi camera, computes a solution on a Raspberry Pi Zero 2 W, and solves it with just two servos, showing progress on a 1.77-inch display.
Safety first
- The DS3225MG servos are strong; keep fingers out of the cube holder and top cover while the robot is powered.
- The designer advises powering the robot only from USB supplies with class 2 insulation from mains, like an official Pi or phone charger.
Rules and laws
- CUBOTino files are shared by Andrea Favero under the license stated in the repository (CC BY 4.0 per GitHub); credit him if you share your build.
Parts
| Part | Qty | Approx. each | Subtotal |
|---|---|---|---|
| ANNIMOS DS3225MG 25 kg 270-degree servoThe designer's recommended servo (270 degrees, 500-2500 us pulses); comes with a 25T arm. Typical $16-26, no verified link.Amazon (search) | 2 | $20 | $40 |
| Raspberry Pi Zero 2 WH (with header)Typical $17-24, no verified link.Amazon (search) | 1 | $20 | $20 |
| OV5647 5 MP camera for Raspberry Pi (V1.3 compatible)PiCamera V1.3 is the designer's default; V2 and V3 also work with settings changes. Typical $8-15, no verified link.Amazon (search) | 1 | $10 | $10 |
| Raspberry Pi Zero camera cable, 30 cmTypical $3-7, no verified link.Amazon (search) | 1 | $5 | $5 |
| 1.77-inch 128x160 ST7735 SPI TFT displayTypical $6-11, no verified link.Amazon (search) | 1 | $8 | $8 |
| TTP223 capacitive touch module (pack)Typical $4-8, no verified link.Amazon (search) | 1 | $6 | $6 |
| AMS1117-3.3 voltage regulator module (pack)Typical $4-8, no verified link.Amazon (search) | 1 | $6 | $6 |
| 3 W LED module (pack)Typical $4-9, no verified link.Amazon (search) | 1 | $6 | $6 |
| Adafruit USB Type-C breakout boardThe designer's USB-C power-input option. Typical $3-5, no verified link.Amazon (search) | 1 | $3.50 | $3.50 |
| 220 uF 16 V electrolytic capacitors (pack)Three used, to limit voltage drop when servos move. Typical $4-8, no verified link.Amazon (search) | 1 | $6 | $6 |
| Solderable perfboard (pack)Typical $6-10, no verified link.Amazon (search) | 1 | $8 | $8 |
| M3 screw and nut assortment kitPlus one M4x20 pivot screw and M2.5 screws per the build PDF. Typical $10-18, no verified link.Amazon (search) | 1 | $14 | $14 |
| SanDisk Ultra 32GB microSD cardTypical $7-12, no verified link.Amazon (search) | 1 | $10 | $10 |
| 5 V 3 A USB-C power supplyTypical $8-13, no verified link.Amazon (search) | 1 | $10 | $10 |
| 3x3 speed cube, 56-57 mmThe design needs a cube between 56.0 and 57.5 mm. Typical $6-12, no verified link.Amazon (search) | 1 | $8 | $8 |
| Estimated total (parts only) | $160.50 | ||
Typical US prices, checked 2026-11-12. Prices change and multi-packs are often cheaper per piece.
As an Amazon Associate I earn from qualifying purchases. Prices change; check the store.
Filament
PETG (1.75 mm): about 500 g (165 m), roughly 25 h of printing.
PETG suggested by the designer (other materials work), 0.2 mm layers; follow the orientation and settings in the CUBOTino build PDF.
AI agents you'll use
- Code helper (ChatGPT, Claude, Gemini or Grok): Helps you follow the official CUBOTino setup script and read errors; explains the camera and servo settings files.
- Build-PDF helper: Turns the long CUBOTino build document into a checklist for your exact servo, camera and display choices.
Tools
- Soldering iron
- Small screwdrivers
- Multimeter
- Computer for SSH and VNC
- USB-C data cable
What you'll learn
- Color detection with OpenCV
- How a two-phase cube solver works
- Tuning servo positions precisely
- Following and adapting a full open-source build
Drop in a scrambled cube, tap the sensor, and watch a tiny robot read the colors and solve it. CUBOTino is a beautifully documented open project, so it is a great first "follow a full real build" experience.
What you'll build
A compact printed robot about 15 cm wide. The cube sits in a holder turned by the bottom servo; the top servo lifts a cover that flips the cube and holds the top layers while the bottom rotates. A Pi Zero 2 W reads each face with the camera, runs a solver, and plans moves for just these two servos. A small display shows status and a touch pad starts it.
The cost range is $140-180 for the parts listed below, allowing about 10% either way for price swings.
Print the parts
Download the STL files from the CUBOTino repository, follow the build PDF for orientation and supports, and credit Andrea Favero. Print in PETG as he suggests.
Wiring
Follow the connection board diagram in the CUBOTino PDF exactly; the summary below is for orientation only.
| Part | Connects to | Notes |
|---|---|---|
| Two servos | Connections board, powered from the 5 V input | With the 220 uF capacitors near the servo headers. |
| Display | Pi SPI pins via the connections board | ST7735 128x160. |
| Touch module and LED module | Pi GPIO via the connections board | 3.3 V from the AMS1117 regulator as the PDF shows. |
| Camera | Pi Zero CSI connector | 30 cm Zero cable. |
| USB-C breakout | 5 V 3 A supply | Powers Pi and servos. |
Step-by-step
- Read the whole CUBOTino PDF once, then pick your servo, camera and display options.
- Print all parts and clean the holes as the PDF describes.
- Flash the SD card and run the official setup script from the repository.
- Build the connections board and test each part (servos, display, camera, touch).
- Assemble the robot and tune the servo positions with the designer's GUI over VNC.
- Calibrate the camera framing and colors.
- Solve your first cube, then enable autostart.
Code
The official CUBOTino Python code, installed by its setup script. You tune settings files rather than writing new code.
Prompt for the code helper:
I am building CUBOTino autonomous on a Pi Zero 2 W with DS3225MG servos, an OV5647 (PiCamera V1.3) camera and a 1.77-inch ST7735 display.
Using only the README and build PDF in github.com/AndreaFavero71/cubotino, give me a checklist of settings to change for my parts, and help me read this error from the setup script: <paste>.
Troubleshooting
- Cube does not flip cleanly: Tune the top cover positions in the servo GUI, in small steps.
- Colors misread: Lighting changed or camera framing shifted. Re-run the camera calibration.
- Pi reboots when servos move: Power is sagging. Check the 3 A supply and the capacitors.
Print files
- CUBOTino autonomous (Andrea Favero, CC BY 4.0. We don't host this file.)
Files, code and docs
- CUBOTino autonomous (AndreaFavero71/cubotino) (CC-BY-4.0)
- CUBOTino on Instructables (Andrea Favero) (Vendor docs)
Last checked 2026-11-12. Double-check parts against your own board and seller listings before you buy.