AI-generated art pen plotter
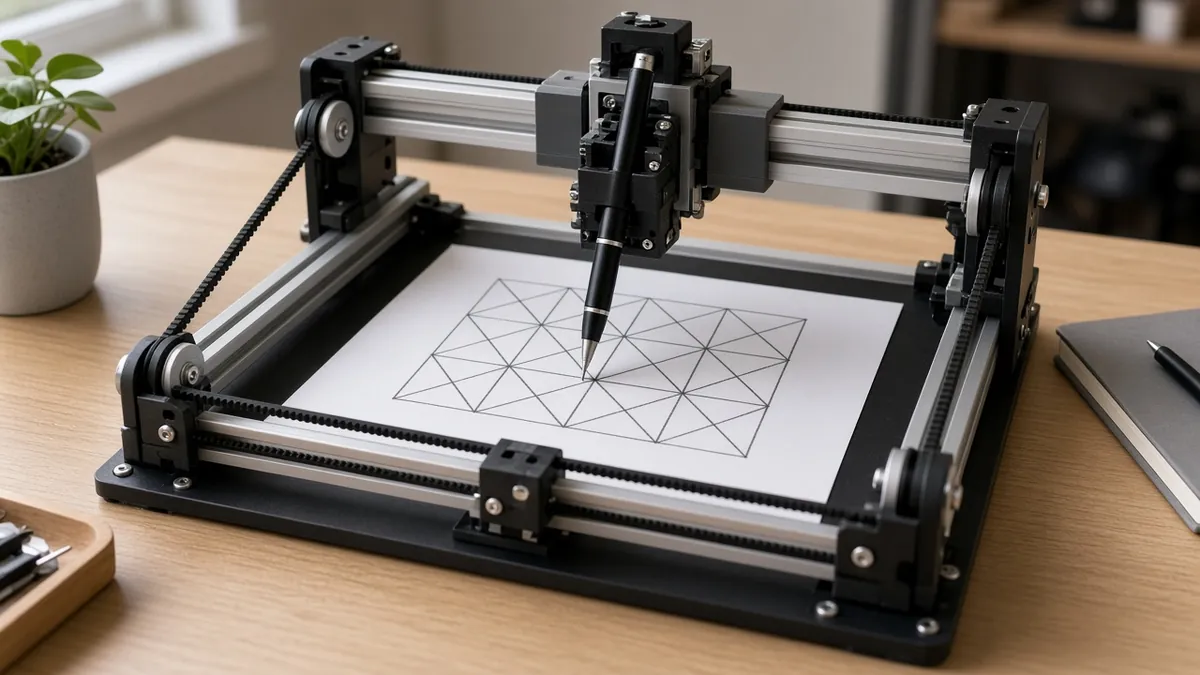
A small belt-driven pen plotter that draws line art on paper. You turn an image or an AI line drawing into paths, then official GRBL moves the motors while you watch the pen work.
Safety first
- Stepper motors and belts can pinch fingers. Keep hair and cables away during tests. Power off before you reach into the gantry.
- Set the stepper-driver current with the official method for your driver. Too much current overheats the driver and the motor.
- Use a listed 12 V or 24 V supply. Do not open a mains supply or wire 120 V into the project. Cap unused mains-power terminals on the supply.
- A mis-set workspace can drive the pen into a clip or off the desk. Set software limits and keep the first drawings slow.
Rules and laws
- Only plot artwork you have the right to use. Credit both the plotter design author and any image or model you start from.
Parts
| Part | Qty | Approx. each | Subtotal |
|---|---|---|---|
| ELEGOO UNO R3 (ATmega328P), Arduino IDE compatible, with USB cableTypical $14-$18 each (or see pack note). ASIN confirmed. Typical $15-18.Amazon | 1 | $17 | $17 |
| Arduino CNC shield that matches an UNO-class boardTypical $6-12, no verified link.Amazon (search) | 1 | $8 | $8 |
| NEMA 17 stepper motorTypical $9-16 each, no verified link.Amazon (search) | 2 | $12 | $24 |
| A4988 or DRV8825 stepper driver with heat sinkTypical $2-5, no verified link. Set current from the driver datasheet.Amazon (search) | 2 | $3 | $6 |
| GT2 belt, pulleys, and idlers as the design specifiesTypical $10-25, no verified link. Sizes must match the chosen design.Amazon (search) | 1 | $15 | $15 |
| Linear rods or rails as the design specifiesTypical $15-40, no verified link.Amazon (search) | 1 | $20 | $20 |
| Listed 12 V DC supply for steppers, sized to the driversTypical $15-25, no verified link.Amazon (search) | 1 | $18 | $18 |
| Optional small servo or solenoid for pen up/downTypical $3-8, no verified link.Amazon (search) | 1 | $4 | $4 |
| Pens, clips, and paper for a plotterTypical $4-10, no verified link.Amazon (search) | 1 | $6 | $6 |
| Estimated total (parts only) | $118 | ||
Typical US prices, checked 2026-11-12. Prices change and multi-packs are often cheaper per piece.
As an Amazon Associate I earn from qualifying purchases. Prices change; check the store.
Filament
PLA (1.75 mm): about 280 g (94 m), roughly 16 h of printing.
PLA, 0.2 mm layers, 25% infill, 3-4 walls, supports where gantry parts have overhangs. Print long rails or sides in the orientation the design recommends so they stay straight.
AI agents you'll use
- Firmware and paths helper (ChatGPT, Claude, Gemini or Grok): Points you at official GRBL docs and a documented path-generation tool, helps you set travel limits, and refuses to invent pin maps for an unknown CNC shield.
- Mechanical helper: Checks belt path, square axes and a safe pen-up height against the design photos you share.
Tools
- 3D printer
- Hex drivers and a screwdriver
- Computer with a serial connection
- Calipers
- Optional soldering iron
What you'll learn
- Assembling a simple CNC-style XY pen mechanism
- Flashing official GRBL to an Arduino-class controller
- Turning a drawing into toolpaths without inventing a CAM program
- Setting travel limits so the pen cannot crash the frame
A pen plotter is a tiny drawing robot: two motors move a pen over a sheet of paper. You can start from a hand-made SVG, a photographed line drawing, or a line-art export from an image tool. The motion controller is official GRBL, not a mystery firmware.
What you'll build
A desktop XY plotter with a reasonably stiff printed (or mixed wood-and-printed) frame, two NEMA 17 steppers, belts, and a pen lift. Typical drawing area is in the A5 to A4 class, depending on the design you print. It is not a laser or a mill; use a pen only.
Print the parts
Search Printables or Thingiverse for an open-licensed "pen plotter" or "AxiDraw-style" design that publishes a bill of materials, and credit the designer. Do not mix parts from two designs unless you know they share a rail size. Print the gantry parts with the settings above and check rod or rail diameters with calipers before you buy hardware.
If you cannot confirm the license or the rail sizes, stop and pick a better-documented file rather than guessing.
Wiring
Use the official pin map for GRBL on your exact board and CNC shield. A typical UNO + CNC shield looks like this, and you must confirm it:
| Function | Typical connection | Notes | |---|---| | X stepper | Shield X driver socket, motor toward the X motor | Set driver current before long moves. | | Y stepper | Shield Y driver socket | | | Pen lift | A servo on the official GRBL servo pin if you use that firmware option, or a small Z axis | Follow the design. | | Steppers power | Shield VM / power input at the voltage the drivers allow | Common ground with the logic supply. | | USB | UNO USB to the computer | First moves with the pen off the paper. |
Flash official GRBL for your board class. There are forks (32-bit boards, servo-pen builds); only use a fork your design actually documents.
Step-by-step
- Choose one documented plotter design, print its parts, and gather the exact rail, belt and screw sizes it lists.
- Assemble the frame square, with belts tensioned evenly and the pen holder sliding freely.
- Set stepper-driver current with a meter as the driver datasheet describes, power off between adjustments if the docs say to.
- Flash official GRBL, connect with a documented sender, and jog with the pen removed.
- Set travel limits and the workspace size to a little less than the real mechanical travel.
- Make a simple rectangle path and plot it on scrap paper. Adjust steps/mm using a ruler, as GRBL docs describe, rather than inventing a number.
- Generate a first drawing: an SVG you have the right to use, processed with a documented tool such as vpype, then sent as g-code.
- Only then plot a denser generative or AI-traced image, staying inside the margins.
Code
Prompt for the helper:
Help me flash official GRBL to an Arduino UNO with a CNC shield, set conservative travel limits, and check steps/mm with a ruler.
Then show me a documented way (for example vpype) to turn an SVG I own into g-code for a pen plotter.
Do not invent a CNC-shield pin map or a steps/mm value. Point me back to the official GRBL wiki when you are unsure.
A tiny first path should be no more exciting than a square.
Troubleshooting
- Motors buzz and the gantry does not move: driver current is too low, a coil wire is loose, or the belt is skipping. Power off before tightening connectors.
- Circles are ovals: one axis steps/mm is wrong, or a belt is loose.
- Pen rips the paper: no pen-up, too much downward force, or the paper is unclipped.
- Grbl alarm on start: a limit switch is wired closed, or the firmware expects switches you do not have. Read the official alarm list.
Files, code and docs
- GRBL firmware (gnea/grbl) (GPL-3.0)
- vpype (path-processing toolkit) (MIT)
Last checked 2026-11-12. Double-check parts against your own board and seller listings before you buy.