MIDI controller that jams with an AI model
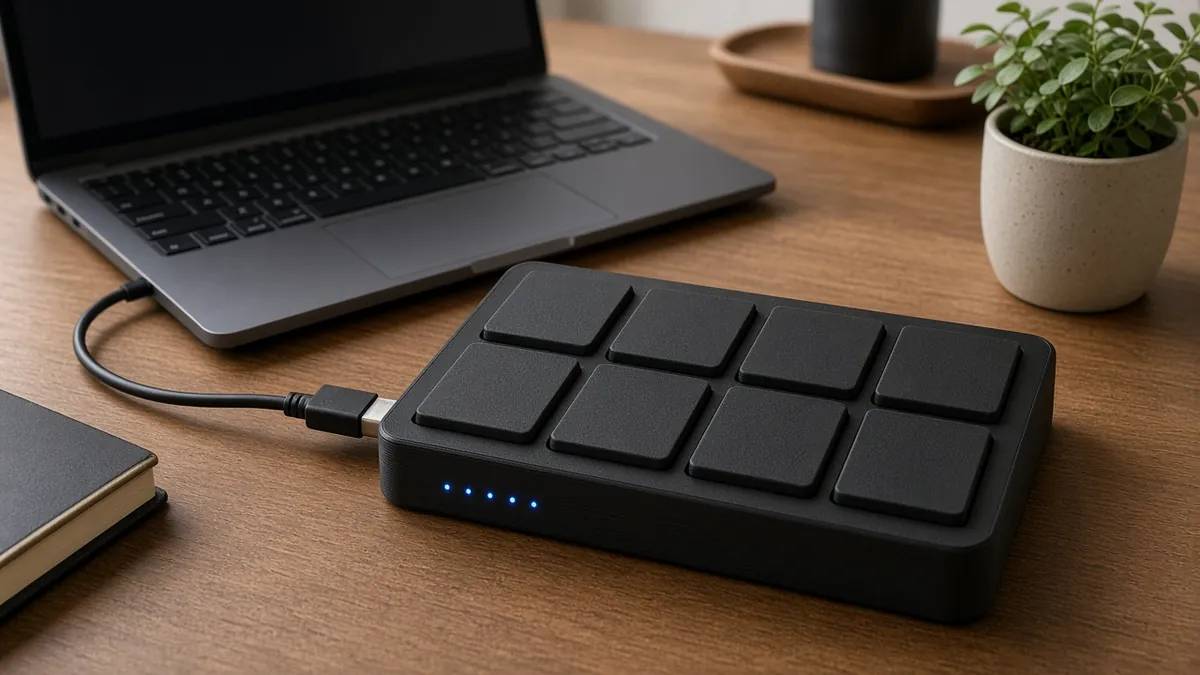
A small USB MIDI pad or keyboard you build or enclose, talking to a computer running a music model or official Magenta tools, so you can play a phrase and hear a continuation.
Safety first
- This is a low-voltage USB project. No mains wiring.
- Soldering irons burn. Unplug USB before you rewire.
- Start at a low speaker volume. Unexpected MIDI bursts can be loud.
Rules and laws
- Model weights, Magenta examples, and any sound fonts have their own licenses. Do not publish someone else's performance or training material as your own.
Parts
| Part | Qty | Approx. each | Subtotal |
|---|---|---|---|
| Raspberry Pi Pico (RP2040) or other native-USB-MIDI boardA classic ESP32 DevKit is not a native USB MIDI device. Typical $4-10, no verified link.Amazon (search) | 1 | $5 | $5 |
| Arcade-style momentary buttonEight pads is a good start. Price is per button. Typical $1.5-4, no verified link.Amazon (search) | 8 | $2 | $16 |
| WS2812B LED (single, for optional feedback)Optional note feedback. Typical $0.2-0.6, no verified link.Amazon (search) | 8 | $0.40 | $3.20 |
| USB data cable and a breadboard or protoboardTypical $4-8, no verified link.Amazon (search) | 1 | $6 | $6 |
| Estimated total (parts only) | $30.20 | ||
Typical US prices, checked 2026-11-12. Prices change and multi-packs are often cheaper per piece.
As an Amazon Associate I earn from qualifying purchases. Prices change; check the store.
Filament
PLA (1.75 mm): about 90 g (30.2 m), roughly 6 h of printing.
PLA, 0.2 mm layers, 20% infill, 2-3 walls, supports if the case has a deep button well. Print the top so the pad holes face the bed only if the design says so.
AI agents you'll use
- Firmware helper (ChatGPT, Claude, Gemini or Grok): Writes a USB MIDI sketch for your exact board, with a clear note map, and does not pretend an ESP32 DevKit is a native USB MIDI device.
- Music-software helper: Helps you route the controller into a documented Magenta or DAW-plus-model workflow on your OS.
Tools
- Soldering iron
- Wire stripper
- Computer with a DAW or a Python environment
- 3D printer or a small project box
- Multimeter
What you'll learn
- Sending USB MIDI from a microcontroller that supports it
- Debouncing pads or keys
- Routing MIDI into a documented music-model or Magenta workflow on a computer
- Keeping latency low enough to play
You build a simple pad controller that shows up as a USB MIDI device. A computer then runs a documented music model or Magenta workflow: you play a short phrase, and the software continues it. The "AI" lives on the computer, not on the pads.
What you'll build
An enclosed 8-pad (or similar) USB MIDI controller on an RP2040, Leonardo-class, or Teensy board, plus software on a laptop that already belongs to you. If you already have a MIDI keyboard, you can skip the hardware and jump to the software, but this project assumes you want to build the controller.
Print the parts
Search Printables or Thingiverse for an "8 pad MIDI controller" case that matches your button size, and credit the designer, or use a project box. Print with the settings above. Leave a hole for USB.
Wiring
Example for a Raspberry Pi Pico with eight buttons to ground (active low). Confirm pin names for your board.
| From | To (Pico example) |
|---|---|
| Button 1-8, one side | GND (common) |
| Button 1-8, other side | GP2 through GP9, with the internal pull-up enabled in firmware |
| Optional LED data | A documented GPIO through a current-limiting resistor or a proper WS2812B 3.3-to-5 V data path if the strip is 5 V |
| USB | Computer USB port |
Do not wire a 5 V LED strip's data line carelessly into a 3.3 V pin without checking the LED module.
Step-by-step
- Choose a board that supports native USB MIDI. Install the official core or SDK for it.
- Wire two buttons first. Ask the firmware helper for a sketch that sends a MIDI note on and note off, and confirm the computer sees a MIDI device.
- Add the remaining pads, debounce them, and write down your note map (for example C3 and up).
- Print or close the case so the buttons do not bounce around.
- On the computer, route the MIDI device into a documented Magenta example, a DAW, or another official music-model tool you can actually run locally.
- Play a short phrase, generate a continuation, and listen on headphones first.
- Only then add LEDs or extra knobs (CC messages) if you still want them.
Code
Prompt for the firmware helper:
Write a USB MIDI firmware for a Raspberry Pi Pico (or I will name an Arduino Leonardo / Teensy instead) with eight buttons on GP2-GP9 to ground, internal pull-ups, debounce, and note on/off for notes 60-67.
Use a documented USB MIDI library for that board. Do not use delay() in a way that stacks missed releases. Comment the note map.
Prompt for the music-software helper:
Show me an official Magenta or other documented local workflow that takes a MIDI phrase from a hardware controller and produces a continuation on the same computer.
Do not invent a command line. Point me to current project documentation, and warn me if the tool actually needs a heavy GPU.
Troubleshooting
- Computer does not see a MIDI device: you used a board without native USB MIDI, or a charge-only cable, or the wrong firmware type.
- Notes stuck on: missing note-off, or bounce. Release handling comes first, fun LED effects later.
- Huge latency: the model is too heavy, or the DAW buffer is large. Test with a plain software synth first to isolate the controller.
- Wrong octave: your note map does not match the software instrument. Shift in firmware or in the DAW.
Files, code and docs
Last checked 2026-11-12. Double-check parts against your own board and seller listings before you buy.