Drone follow-me tracker
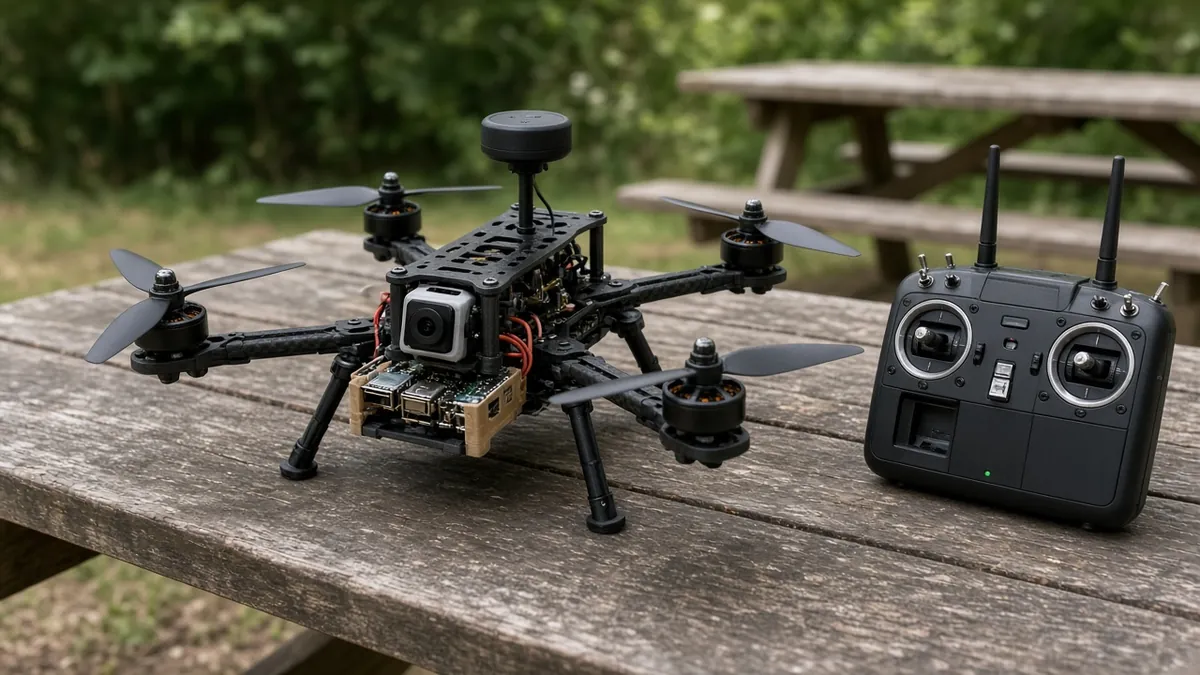
A companion computer and camera on an ArduPilot aircraft that tries to keep you in the frame and send follow or guidance commands over MAVLink. This is an add-on to a capable, legal GPS quad, not a first drone.
Safety first
- A follow-me aircraft can fly into the person it is tracking. First tests should follow a high-visibility cone or a bicycle helmet on a stick, in a huge empty field, with a human pilot on a stick override and a tested RTL.
- Do not test over people, roads, water, or trees. Keep visual line of sight and a legal altitude.
- Re-weigh the aircraft after you add the computer and camera. Recheck the power budget so the companion computer cannot brown out the autopilot.
- LiPo and prop safety are the same as any other drone. Props off whenever you are programming on the bench.
Rules and laws
- In the US, FAA registration and Remote ID apply if the finished aircraft weighs more than 250 g ready to fly, and this add-on will usually push a GPS quad over that line, so weigh it. The operator needs TRUST (recreational) or Part 107 (commercial) and must follow airspace rules either way. Adding a camera does not relax them. See https://www.faa.gov/uas
- Do not follow or record people who have not agreed to it. This is not a surveillance tool.
Parts
| Part | Qty | Approx. each | Subtotal |
|---|---|---|---|
| A GPS ArduPilot aircraft that already flies, or budget to build one (see the mapping-drone project)If you already have the aircraft, added cost is mostly the computer, camera, and mount. Typical $200-550, no verified link.Amazon (search) | 1 | $400 | $400 |
| Raspberry Pi 5, 4 GB (SC1111/SC1431)A Pi 4 can work; a Pi 5 has more headroom for OpenCV. Price seen ~$110.00 on PiShop.us, Nov 12, 2026. Price seen $110.00, in stock, on PiShop.us (a Raspberry Pi approved reseller). Amazon listing B0CK3L9WD3 exists but was not used because reseller pricing was lower and clearer.PiShop.us · price seen on 2026-11-12 | 1 | $110 | $110 |
| Raspberry Pi Camera Module 3 Standard, 12 MP autofocusOr a USB camera with a documented Linux driver. Price seen ~$29.25 on Adafruit, Nov 12, 2026. Price seen $29.25, in stock, on Adafruit. Pi 5 needs a separate adapter cable.Adafruit · price seen on 2026-11-12 | 1 | $29.25 | $29.25 |
| BEC or documented power pad to feed a companion computerDo not starve the autopilot. Typical $8-18, no verified link.Amazon (search) | 1 | $12 | $12 |
| Serial or telemetry lead between a companion computer and an autopilot UARTTypical $5-12, no verified link.Amazon (search) | 1 | $8 | $8 |
| Estimated total (parts only) | $559.25 | ||
Typical US prices, checked 2026-11-12. Prices change and multi-packs are often cheaper per piece.
As an Amazon Associate I earn from qualifying purchases. Prices change; check the store.
Filament
PLA (1.75 mm): about 30 g (10.1 m), roughly 2 h of printing.
PLA or PETG for a camera and companion-computer mount, 0.2 mm layers, 25% infill, supports as needed. Keep the mount stiff and out of the prop arc.
AI agents you'll use
- MAVLink / vision helper (ChatGPT, Claude, Gemini or Grok): Helps wire a documented MAVSDK or pymavlink example to a simple OpenCV tracker, and refuses to invent ArduPilot follow-me parameters.
- Safety research helper: Stress-tests the idea of a camera that follows a person and reminds you this is not a license to fly over people.
Tools
- Already-flying ArduPilot quad or similar GPS aircraft
- Soldering iron
- Computer for ground tests
- Kitchen scale
- LiPo charger and fire-safe bag
- High-visibility vest or cone for first outdoor tests
What you'll learn
- Talking to ArduPilot over MAVLink from a companion computer
- A simple computer-vision track (a clearly marked target first, not a magic 'follow any person' model)
- Why follow-me is a safety problem around people and trees
- Updating the weight, power budget and legal status of the aircraft
"Follow me" is a vision or GPS problem bolted onto an aircraft that must already fly well. You will add a companion computer and a camera, send MAVLink guidance to official ArduPilot, and test against a clearly marked object long before you stand under the aircraft.
What you'll build
A mount for a Raspberry Pi-class computer and a camera on a GPS ArduPilot quad (or similar), plus software that tracks a high-contrast target and sends conservative guidance commands. The $250-550 range assumes you may still need the aircraft; if you already have one, budget mainly for the computer, camera, BEC and mount.
This is not a Skydio clone and will not be as reliable as a commercial follow-me drone.
Print the parts
Search Printables or Thingiverse for a Raspberry Pi (or your SBC) and camera mount that fits your frame, or design a simple one, and credit any designer you use. Keep mass near the center, out of the prop arc, and do not block GPS or vents. Print with the settings above.
Wiring
Use the official companion-computer and UART docs for your autopilot.
| Function | Typical connection | Notes | |---|---| | Autopilot UART TX/RX / GND | Companion computer UART or a USB-serial adapter | Voltage levels must match (often 3.3 V). Confirm pinout in the official docs. | | Companion power | A BEC or documented power pad that can supply the Pi | Do not starve the autopilot. | | Camera | The Pi camera ribbon or a USB camera | Strain-relieve the cable. | | Battery | The aircraft power system you already trust | Re-check current after adding the computer. |
Step-by-step
- Start from an ArduPilot aircraft that already flies, holds position, and returns home reliably.
- On the bench, with props off, connect the companion computer to a UART and run an official MAVSDK or pymavlink "heartbeat / arm status" example.
- Mount the camera, get a video preview on the ground, and write or adapt a simple OpenCV tracker for a high-contrast marker (a printed AprilTag or a brightly colored cone - pick a documented method and stick to it).
- Print and fit a stiff mount. Re-weigh the aircraft and complete any legal steps that the new weight or camera require.
- In a large empty field, have a spotter and a pilot on manual override. First, track the marker while the aircraft is held or in a short, high, stationary hover, not chasing you.
- Only then allow gentle guided motion toward a marker that is not a person. Set tight speed and geofence limits.
- Abort to RTL or manual at the first confusion (lost target, wind, an unexpected obstacle).
- Do not "graduate" to following a person unless you have a serious safety plan, legal clearance, and a lot of uneventful marker flights. Many builders should stop at the marker stage.
Code
Prompt for the helper:
Help me outline a Python program on a Raspberry Pi that (1) opens a camera with OpenCV, (2) tracks a high-contrast marker, and (3) sends conservative velocity or position setpoints to ArduPilot over MAVSDK or pymavlink.
Do not invent ArduPilot parameter names or claim this is safe to fly over people. Point me to official MAVSDK and ArduPilot companion-computer documentation for the UART setup.
Ground-test MAVLink first, props off, before you close any vision loop on a live aircraft.
Troubleshooting
- No heartbeat from the autopilot: wrong UART, wrong baud, crossed TX/RX, or a voltage-level mismatch.
- Pi browns out when the camera starts: the BEC cannot supply the current. Fix power before any flight.
- Tracker jumps to the sky or a shadow: your algorithm is not ready. Go back to a more distinctive marker and ground tests.
- Aircraft inches toward the pilot: stop. That is a successful track of the wrong goal. Change the test target and the abort plan.
Files, code and docs
- ArduPilot official site (Vendor docs)
- MAVSDK documentation (Vendor docs)
- OpenCV project (Apache-2.0)
- FAA Unmanned Aircraft Systems (Vendor docs)
Last checked 2026-11-12. Double-check parts against your own board and seller listings before you buy.