Generative LED wall art with WLED
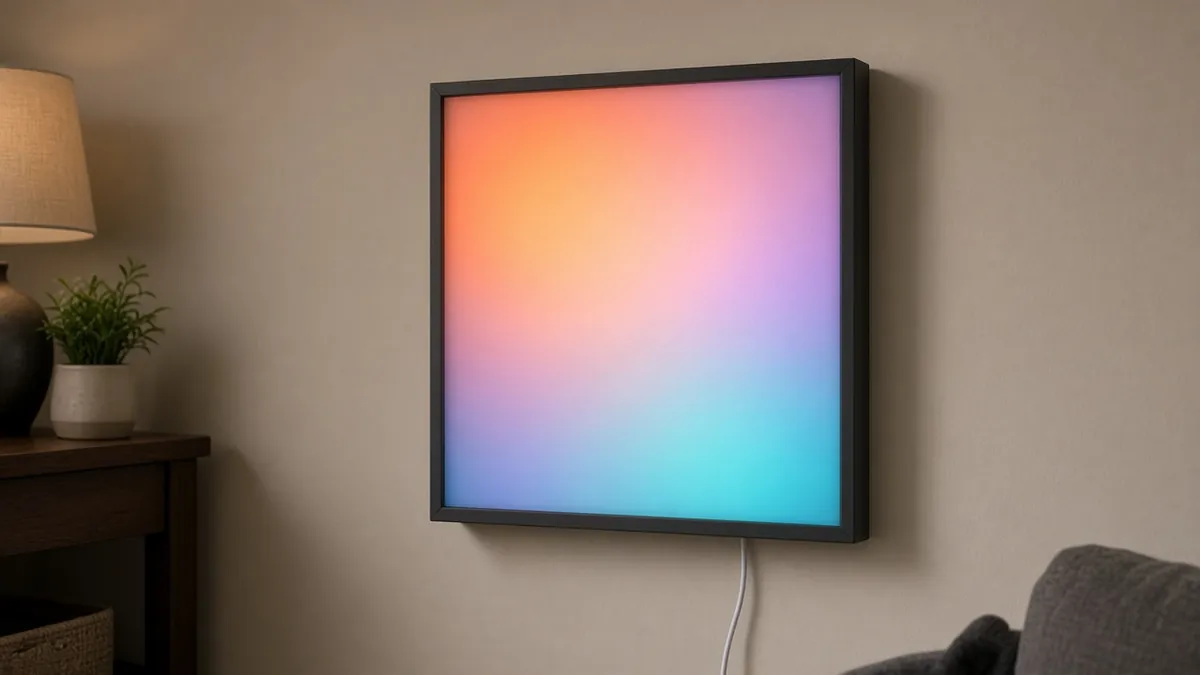
A framed LED matrix or strip running official WLED on an ESP32, with patterns that can react to sound or to a simple incoming effect. A bright, low-voltage art piece for a wall you already control.
Safety first
- Use a listed 5 V supply. Do not open a mains-power supply or wire 120 V into the frame. Keep the mains brick outside the artwork.
- Size the supply for the LED count and cap brightness in software so you never pull full-white current if the supply cannot do it. Undersized wiring gets hot.
- Inject 5 V at both ends (or every so often) on longer strips, as WLED and LED vendors describe, so the far end does not brown out.
- The first power-up should be at low brightness, with the supply fused or current-limited if you can.
Parts
| Part | Qty | Approx. each | Subtotal |
|---|---|---|---|
| Espressif ESP32-DevKitC-32E (DevKitC V4) development boardRecommended for WLED, especially for later audio-reactive features. Official Espressif 38-pin DevKitC V4 with ESP32-WROOM-32E (4 MB). Micro-USB port, not USB-C. Buy only the official 38-pin Micro-USB board, not a USB-C or 30-pin clone. Primary listing: Mouser 356-ESP32-DEVKITC32E, $10.20, 1,701 in stock on Nov 12, 2026, per Findchips (https://www.findchips.com/search/ESP32-DEVKITC-32E). The Mouser US page itself returned 403 to a direct fetch, so click-confirm the US storefront before you order. Mouser Netherlands listed 1,622 in stock at €8.60 the same day. Do not use DigiKey as the default today (search snippets showed 0 in stock / long lead time). Official Amazon listing https://www.amazon.com/dp/B09MQJWQN2 was still unavailable; use it if it returns. Amazon search for the official board: https://www.amazon.com/s?k=ESP32-DevKitC-32E. Adafruit #3269 remains $15.00 and was out of stock (https://www.adafruit.com/product/3269). Typical $10-16.Mouser · price seen on 2026-11-12 | 1 | $10.20 | $10.20 |
| BTF-LIGHTING WS2812B 16x16 (256 pixel) flexible matrix, 5 VTypical $16-$28 each (or see pack note). ASIN confirmed. Typical $16-28. Plan power at up to 60 mA per LED at full white and cap brightness.Amazon | 1 | $22 | $22 |
| 5 V, 3 A (or better) DC power supplySize the supply to your LED count and cap brightness in WLED. Typical $10-18 for a listed 5 V supply, no verified link.Amazon (search) | 1 | $12 | $12 |
| Electrolytic capacitor, 1000 uF, 10 V or higherAcross 5 V and GND near the first LED. Typical $0.50-1.50, no verified link.Amazon (search) | 1 | $0.80 | $0.80 |
| Resistor, 330 ohm (220-470 ohm is fine)In the data line to the first LED. Typical a few cents to $0.40 in a small pack, no verified single-item link.Amazon (search) | 1 | $0.20 | $0.20 |
| 3.3 V to 5 V logic level shifterOptional, recommended on longer runs. Typical $2-6, no verified link.Amazon (search) | 1 | $3 | $3 |
| Diffuser sheet or translucent print, plus a hanging pointTypical $4-10, no verified link.Amazon (search) | 1 | $6 | $6 |
| Estimated total (parts only) | $54.20 | ||
Typical US prices, checked 2026-11-12. Prices change and multi-packs are often cheaper per piece.
As an Amazon Associate I earn from qualifying purchases. Prices change; check the store.
Filament
PLA (1.75 mm): about 120 g (40.3 m), roughly 8 h of printing.
PLA, 0.2 mm layers, 15-20% infill, 2-3 walls, supports if the frame needs them. A thin printed or sheet diffuser works better than a thick solid front.
AI agents you'll use
- WLED helper (ChatGPT, Claude, Gemini or Grok): Walks through official WLED install, GPIO choice, LED count, color order and a brightness cap, and refuses to undersize the power supply.
- Power helper: Checks LED count times current against the supply rating and suggests a safe maximum brightness.
Tools
- 3D printer or a picture frame and a diffuser sheet
- Soldering iron
- Wire stripper
- Computer or phone on the same Wi-Fi
- Multimeter
What you'll learn
- Powering WS2812B or SK6812 LEDs safely from a 5 V supply
- Flashing official WLED on an ESP32
- Why a data resistor and a bulk capacitor are not optional on longer runs
- Picking a matrix size you can actually power
A framed panel of addressable LEDs, an ESP32, and official WLED is enough to make a wall piece that you can change from your palmtop. Generative or sound-reactive patterns come from WLED itself, or later from official interfaces that talk to it. You do not need to write firmware to get a good first result.
What you'll build
A 16x16 class matrix, or a short strip folded into a frame, with a diffuser, a properly sized 5 V supply, and WLED on an ESP32. Start at low brightness.
Print the parts
Search Printables or Thingiverse for a "16x16 LED matrix frame" or a strip channel with a diffuser, credit the designer, or reuse a deep picture frame and a sheet of parchment or acrylic. Print with the settings above. Leave a vented bay for the ESP32 and keep the mains-power brick out of the frame.
Wiring
| From | To |
|---|---|
| 5 V supply + | LED 5 V, plus the 1000 µF capacitor (positive to 5 V) near the first pixel |
| 5 V supply - | LED GND, capacitor negative, and ESP32 GND (common ground is required) |
| ESP32 5 V / USB | Use the LED supply only if the current and a proper regulator path are safe; otherwise power the ESP32 from USB during tests |
| ESP32 data GPIO (often GPIO 16 in WLED examples - confirm in the official docs) | Series 330 ohm resistor, then the first LED DIN |
| Optional level shifter | Between the ESP32 GPIO and the resistor, if you use one |
| Extra 5 V injection | Mid or far LED 5 V pads on longer runs |
Do not power a large matrix from the ESP32 5 V pin.
Step-by-step
- Count your LEDs and size a 5 V supply with a large margin, or commit to a low brightness cap and write that cap down.
- Solder or plug the capacitor, resistor, common ground and data line, and do a first test on a short strip if you can.
- Flash official WLED to the ESP32 using the current install method at kno.wled.ge.
- In the WLED UI, set the GPIO, LED count, color order (GRB is common for WS2812B, but not guaranteed), and a low maximum brightness.
- Confirm every pixel lights at low brightness before you mount the diffuser.
- Build the frame, strain-relieve the wires, and hang it so the supply brick has air and cannot be mistaken for something to unplug blindly.
- Then try audio-reactive or other official effects if your ESP32 and microphone setup are supported.
Code
Official WLED, not a custom sketch, is the right starting point.
Prompt for the helper:
Walk me through installing official WLED on an ESP32, setting a 16x16 WS2812B matrix, a data pin, color order, and a conservative brightness cap.
Help me estimate current at that brightness. Do not tell me to power the matrix from the ESP32 5 V pin. Point me to kno.wled.ge for the current install method.
Troubleshooting
- First pixel is the wrong color or all pixels are white: color order is wrong, or the data line is too long without a resistor or shifter.
- The far end is dim or flickers: voltage drop. Inject 5 V and thicken the ground.
- ESP32 resets when the effect hits white: the supply or the USB port is collapsing. Cap brightness and move LED power off the DevKit.
- WLED cannot find the strip: wrong GPIO, or you flashed a build without the right chip support. Re-read the official install page.
Files, code and docs
- WLED documentation (Vendor docs)
- WLED firmware (Aircoookie/WLED) (EUPL-1.2-or-later)
Last checked 2026-11-12. Double-check parts against your own board and seller listings before you buy.