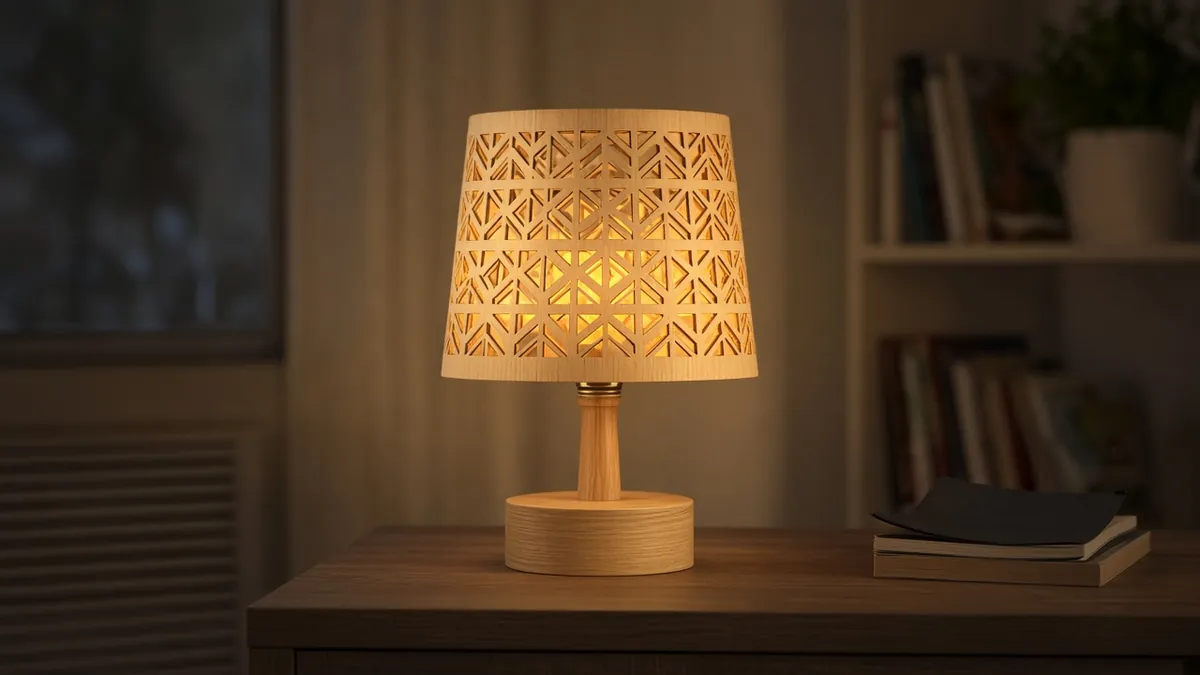
Laser-cut AI pattern lamp
A lamp whose shade is an AI-generated pattern, cut in plywood or acrylic on a laser you already can use, sitting on a 3D-printed or ready-made base with a listed lamp kit or a low-voltage LED.
Safety first
- Lasers can injure eyes and start fires. Use a shop with training, enclosed machines, approved materials, and ventilation. Never bypass a laser's guards.
- Do not laser PVC or other unapproved plastics; the fumes can be hazardous and can damage the machine. Ask the shop.
- For mains lamps, use a listed kit or have a qualified person do the electrical work. Do not improvise a 120 V socket inside a printed base. A USB or low-voltage LED lamp is the safer default.
- Use bulbs or LEDs within the kit's wattage and heat limits so the shade cannot overheat or ignite.
Rules and laws
- Follow your makerspace rules and any local electrical code. A homemade mains lamp may not meet product-safety rules if you tried to sell it.
- Only cut patterns you have the right to use. Credit the source of the image or model.
Parts
| Part | Qty | Approx. each | Subtotal |
|---|---|---|---|
| Laser-safe plywood or acrylic sheet approved by your shopUse only material your shop approves. Never laser PVC. Typical $8-20, no verified link.Amazon (search) | 1 | $12 | $12 |
| UL-listed (or equivalent) lamp kit, or a USB / low-voltage LED with a listed supplyPrefer a complete listed kit or a USB LED. Do not hard-wire a mains socket if you are not qualified. Typical $10-25, no verified link.Amazon (search) | 1 | $15 | $15 |
| Optional printed or wooden lamp baseTypical $5-15, no verified link.Amazon (search) | 1 | $8 | $8 |
| Screws, felt pads, and shade clipsTypical $3-8, no verified link.Amazon (search) | 1 | $5 | $5 |
| Estimated total (parts only) | $40 | ||
Typical US prices, checked 2026-11-12. Prices change and multi-packs are often cheaper per piece.
As an Amazon Associate I earn from qualifying purchases. Prices change; check the store.
Filament
PLA (1.75 mm): about 50 g (16.8 m), roughly 4 h of printing.
PLA or PETG for a base, 0.2 mm layers, 20% infill, 3 walls, supports if the base has an overhang. If you use a ready-made lamp base, filament can be skipped and the printed base is optional.
AI agents you'll use
- Pattern helper (ChatGPT, Claude, Gemini or Grok): Helps you turn a high-contrast image into a simple SVG with cut and etch layers, and reminds you to check the makerspace's file rules.
- Safety helper: Reviews material choice and refuses any plan that involves wiring a raw mains socket or lasering an unknown plastic.
Tools
- Access to a diode or CO2 laser at a makerspace or school (or a vendor who cuts from your file)
- Computer to prepare an SVG
- Sandpaper
- Optional 3D printer
What you'll learn
- Turning a high-contrast pattern into a cut-ready SVG
- Laser-cut kerf, etch vs cut, and material choice at a basic level
- Assembling a lamp with a listed kit instead of wiring mains yourself
- Crediting both the pattern source and the material
The "AI" in this project is the pattern on the shade, not a microcontroller. You generate or trace a high-contrast design, a laser cuts it, and a listed lamp kit or a USB LED lights it from inside. It is one of the faster Cool Projects if you already have shop access.
What you'll build
A small table lamp: a cut plywood or acrylic shade, and a base that holds a listed lamp kit or a low-voltage LED. Typical shade height is in the 15-25 cm class, depending on your sheet and design.
Print the parts
A printed base is optional. If you print one, search Printables or Thingiverse for a lamp base that is made to accept a listed kit or a USB LED, and credit the designer. Do not print a base that requires you to screw in a bare mains socket unless an electrician is doing that work. Print with the settings above, or use a wooden block and a hole saw.
The shade itself is laser-cut, not printed.
Wiring
Prefer a complete listed kit or a USB LED, and then follow that product's instructions exactly. There is no microcontroller table for the default build.
| Approach | What you do |
|---|---|
| USB / 5 V LED puck | Plug the listed adapter into the LED. Route the cable through the base. No mains splices. |
| Listed lamp kit | Assemble the kit as written, including its strain relief and bulb wattage limit. If the instructions are unclear, stop and get qualified help. |
| Existing certified lamp | Replace only the shade, and keep the original electrical parts. |
Step-by-step
- Write a prompt or start from an image you have the right to use, and get a high-contrast black-and-white pattern. Keep bridges in the design so the shade does not fall apart.
- Convert it to an SVG with a cut layer (and an optional etch layer). Ask the pattern helper, then fix the file in a vector tool. Add a mounting hole that matches your base.
- Ask the shop which materials and thicknesses they allow, and what kerf and file format they want.
- Cut a small test square first, then the full shade. Sand lightly and dry-fit the base.
- Install a USB LED or a listed lamp kit as designed. Fit a bulb or LED within the power and heat limit.
- Test on a clear table, feel the shade after 15 minutes, and add felt pads so the base does not scratch furniture.
Code
There is no required firmware. Prompt for the pattern helper:
Help me turn a high-contrast pattern into a laser-cut lamp shade SVG with a cut layer and an optional etch layer.
The shade is a cylinder or a box I will describe, with a mounting hole of __ mm. Keep structural bridges so the shade cannot collapse.
Do not tell me to laser an unknown plastic or to wire a raw 120 V socket. I will have a makerspace check the file.
Troubleshooting
- The shade falls into pieces: not enough bridges, or the cut was too aggressive. Add links and recut.
- The pattern looks muddy: too much fine etch for the kerf. Enlarge details and test again.
- The shade smells or browns too much: ask the shop about power, speed and material. Finish only with products meant for lamps, if you finish at all.
- The base gets hot: the bulb is too powerful, or ventilation is blocked. Switch to a low-voltage LED kit.
Files, code and docs
Last checked 2026-11-12. Double-check parts against your own board and seller listings before you buy.