Mapping drone with ArduPilot
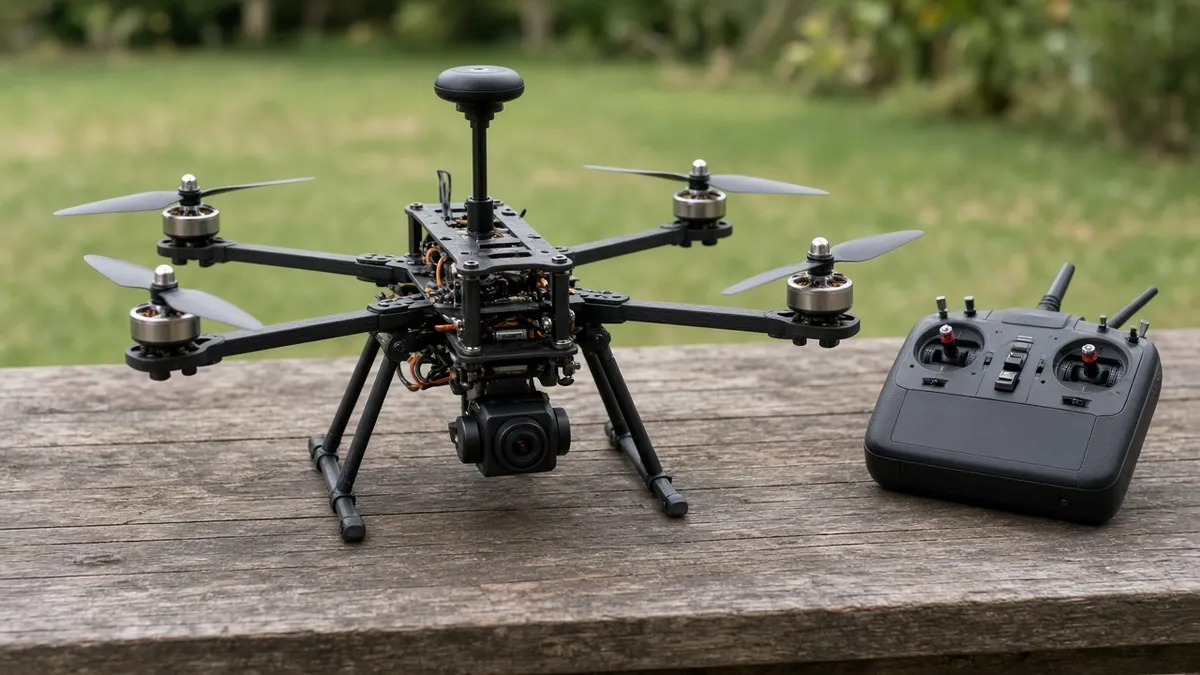
A GPS-guided quad or small airframe running official ArduPilot, planned in Mission Planner (or QGroundControl), that flies a grid and takes photos for a map. This is a heavier, more serious aircraft than a 3-inch freestyle quad.
Safety first
- This aircraft will almost certainly weigh more than 250 g with a battery. Treat it as a registered, Remote ID-compliant aircraft in the US unless you have weighed it and confirmed otherwise - and you should still weigh it.
- Props are sharp. Keep them off during bench setup. First flights in a large, legal open area with a working GPS fix, a tested RTL (return-to-launch) failsafe, and a battery margin.
- Charge LiPo packs in a fire-safe bag, never unattended. Do not fly a damaged pack.
- A mapping camera is not a license to survey other people's property or to fly over people. Keep a visual line of sight unless you are operating under a rule set that allows otherwise.
Rules and laws
- US: registration, Remote ID, TRUST (for recreational rules), and airspace restrictions almost certainly apply to a mapping quad. Confirm at https://www.faa.gov/uas. Commercial mapping may need a Part 107 certificate.
- Do not photograph people or private property in a way that breaks local privacy or trespass law.
- Radio and telemetry gear must use legal frequencies and power for your country.
Parts
| Part | Qty | Approx. each | Subtotal |
|---|---|---|---|
| ArduPilot-capable autopilot with a current official target (Pixhawk-class or documented H7 board)Confirm the official ArduPilot target before you buy. Typical $70-150, no verified link.Amazon (search) | 1 | $90 | $90 |
| GNSS/compass module for ArduPilot, mast-mountedTypical $30-60, no verified link.Amazon (search) | 1 | $40 | $40 |
| 5-inch to 7-inch or small mapping quad frameTypical $35-80, no verified link.Amazon (search) | 1 | $50 | $50 |
| Brushless motor sized for that mapping frame (buy four)Typical $15-35, no verified link.Amazon (search) | 4 | $25 | $100 |
| 4-in-1 or separate ESCs rated for your cell count and currentTypical $35-70, no verified link.Amazon (search) | 1 | $50 | $50 |
| RadioMaster RP1 V2 ExpressLRS 2.4 GHz nano receiverOr another system you already fly, plus telemetry if your tools need it. Typical $18-$25 each (or see pack note). ASIN confirmed. Typical $18-25. Also sold at GetFPV; that page did not show a usable price in our fetch.Amazon | 1 | $22 | $22 |
| Action camera or interval camera for mappingTypical $50-150, no verified link.Amazon (search) | 1 | $80 | $80 |
| 4S-6S LiPo sized for the frameTypical $25-55, no verified link.Amazon (search) | 2 | $40 | $80 |
| ExpressLRS 2.4 GHz radio transmitter (e.g. RadioMaster Pocket)Skip if you already own an ExpressLRS radio. Typical $60-90, no verified link.Amazon (search) | 1 | $70 | $70 |
| Propellers sized for your frame and motors (set of 4 plus spares)Match size and pitch to the motor maker's chart. Typical $10-25, no verified link.Amazon (search) | 1 | $15 | $15 |
| Estimated total (parts only) | $597 | ||
Typical US prices, checked 2026-11-12. Prices change and multi-packs are often cheaper per piece.
As an Amazon Associate I earn from qualifying purchases. Prices change; check the store.
Filament
PLA (1.75 mm): about 40 g (13.4 m), roughly 3 h of printing.
PLA or PETG for camera and GPS masts, 0.2 mm layers, 25% infill, supports as needed. TPU for vibration isolation pads, printed slowly. The airframe itself is usually carbon or a commercial frame, not a printed shell.
AI agents you'll use
- ArduPilot setup helper (ChatGPT, Claude, Gemini or Grok): Walks through official ArduPilot documentation: flashing a supported target, accelerometer and compass calibration, failsafe, and a first waypoint mission. Refuses to invent parameter values.
- Safety research helper: Reviews weight, FAA registration, Remote ID, airspace and why mapping flights over people or private property are a problem.
Tools
- Soldering iron
- Hex drivers
- Computer with Mission Planner or QGroundControl
- Kitchen scale
- LiPo balance charger and fire-safe bags
- Tape measure
- Compass calibration space away from metal
What you'll learn
- ArduPilot firmware on a supported autopilot board
- GPS, compass and failsafe configuration
- Drawing a simple mapping mission in Mission Planner
- How weight, Remote ID and airspace rules apply to a larger quad
This is the "fly a grid and take pictures" project, not a freestyle quad. Official ArduPilot runs on a supported autopilot, a GPS/compass gives it a position, and Mission Planner or QGroundControl is where you draw the path. Budget, weight and legal responsibility are all higher than on a 3-inch FPV build.
What you'll build
A GPS-equipped quad (commonly a 5-inch to 7-inch class, or a small mapping frame) with an ArduPilot-capable autopilot, a mast-mounted GNSS/compass, a radio link, and a downward camera. You will configure firmware, calibrate sensors, set failsafes, and fly a short waypoint or survey mission in open, legal airspace.
The $400-800 range is a wide parts estimate for a modest mapping quad and two batteries. A radio transmitter, a good camera, and extra batteries can push you to the top of that range.
Print the parts
Print a GPS mast, camera mount or TPU isolation pads only if you have a file that fits your frame, or search Printables or Thingiverse for your frame name and credit the designer. Most of the structure is a commercial carbon frame. Confirm the camera mount does not block props or the compass.
Wiring
Use the official wiring diagram for your exact autopilot. The table below is a role list, not a pin map.
| Function | Typical connection | Notes | |---|---| | Motors / ESCs | Autopilot PWM or DShot outputs, in the official motor order | Confirm quad X vs other frames in the documentation. | | GPS / compass | A UART plus I2C or the dedicated GPS port | Mount the compass away from power wires and ESCs. | | Receiver | A UART or the RC port, protocol as documented | Test failsafe with props off. | | Telemetry | A UART to your telemetry radio | Optional if you only use USB on the bench. | | Power module / battery | The autopilot power port and ESC power, as documented | Confirm voltage and polarity. | | Camera | Independent power, plus an optional trigger output if you use one | Do not invent a trigger pin; use the autopilot docs. |
Flash official ArduPilot for a supported board target. Do not use a random parameter file from a forum.
Step-by-step
- Choose a frame and a board with a current official ArduPilot target. Confirm motor, prop and battery data from the makers.
- Assemble the airframe, mount the GPS on a mast, and keep high-current wires away from the compass.
- Flash official ArduPilot, then run accelerometer, compass and radio calibration in Mission Planner or QGroundControl, props off.
- Set frame type, battery failsafe, GPS failsafe and return-to-launch. Test radio failsafe on the bench.
- With props still off, confirm motor order and direction as the ArduPilot docs describe.
- Weigh the finished aircraft with battery and camera. Complete any required registration and Remote ID steps before flight.
- Maiden in Stabilize or the official equivalent, in a large legal field, with a GPS fix and enough battery to return.
- After a calm manual flight, draw a small, high-altitude (but legal) waypoint rectangle, not a tight grid over people or cars.
- Only then tighten the photo grid, overlap and camera trigger, still in open, legal airspace.
- After landing, inspect motors, screws and packs. Processing photos into a map is a separate software step (use a documented photogrammetry tool; do not invent a package name if you are not sure).
Code
There is no Arduino sketch. Use official ArduPilot and Mission Planner or QGroundControl.
Prompt for the setup helper:
Walk me through flashing official ArduPilot to a supported board, calibrating accelerometer and compass, setting battery and radio failsafes with RTL, and drawing a first rectangular waypoint mission in Mission Planner.
I will paste the official board name and the frame type. Do not invent parameters, GPS models or a motor order. Point me back to ardupilot.org whenever you are unsure.
Troubleshooting
- Compass warnings or "inconsistent compasses": the GPS mast is too close to an ESC or battery lead, or calibration was done next to a table saw or a car.
- No GPS fix: wait in a clear sky, check the UART and baud in the official docs, and do not maiden in loiter without a fix.
- RTL heads the wrong way: home position was set indoors or the compass is still off. Do not continue the flight.
- Mission starts toward people or a road: land immediately. Redraw over empty, legal ground.
Files, code and docs
- ArduPilot official site (Vendor docs)
- ArduPilot firmware repository (GPL-3.0)
- FAA Unmanned Aircraft Systems (Vendor docs)
Last checked 2026-11-12. Double-check parts against your own board and seller listings before you buy.