3-inch FPV drone with Betaflight
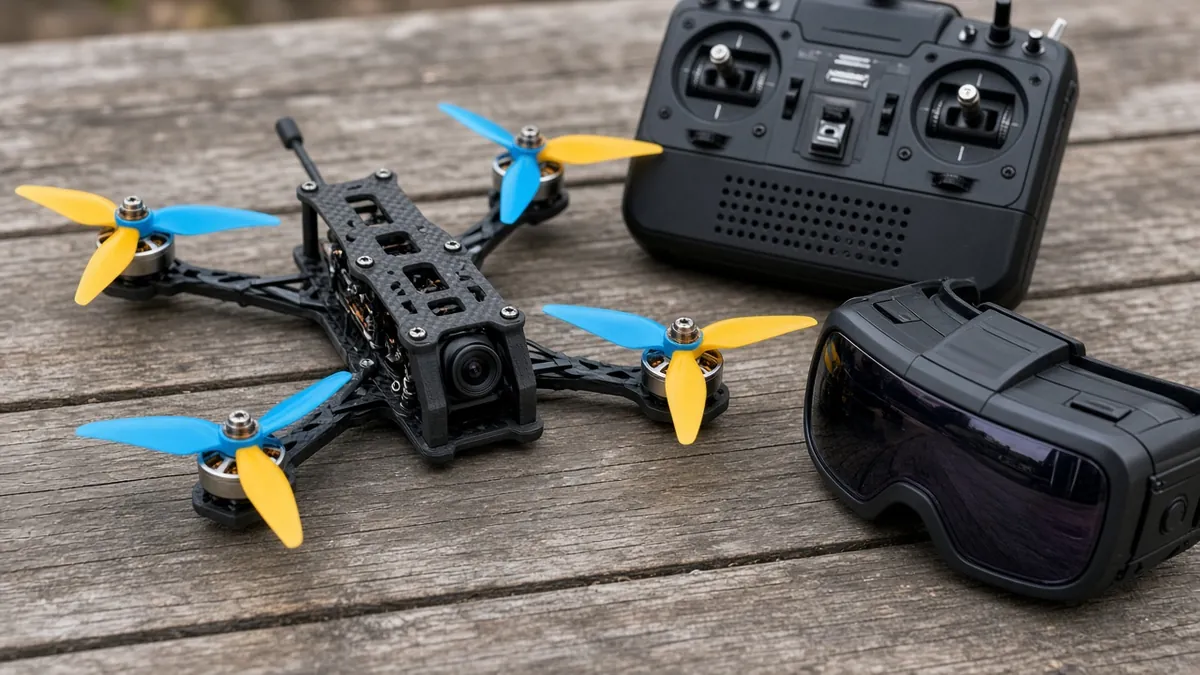
A 3-inch freestyle or cinewhoop-style FPV quad you assemble, flash with official Betaflight, and fly in a legal open area. The frame is carbon; you may print TPU pads and a camera bumper.
Safety first
- Weigh the finished aircraft ready to fly, including battery. Props are sharp: keep them off whenever the board is on USB or the battery can spin the motors. Use a smoke stopper for first power-up.
- Charge LiPo packs in a fire-safe bag, never unattended. Do not charge a damaged or swollen pack, do not puncture a pack, and do not store packs fully charged for long periods. Dispose of damaged packs properly.
- VTX power can injure eyes and is regulated. Use a legal power setting and a sound antenna before you transmit.
- Never fly over people, near airports, or in restricted or crowded airspace. Maiden in an open, legal field, not a living room.
Rules and laws
- In the US, every recreational flyer must pass TRUST, whatever the aircraft weighs, and follow airspace, altitude and FPV visual-observer rules. Registration (with the number marked on the aircraft) and Remote ID apply only if the ready-to-fly weight, including battery, is more than 250 grams. Check https://www.faa.gov/uas for the current text. Rules differ outside the US.
- Use a legal video-transmitter frequency and power for your country.
Parts
| Part | Qty | Approx. each | Subtotal |
|---|---|---|---|
| 3-inch carbon FPV frame (freestyle or cinewhoop)Typical $20-45, no verified link.Amazon (search) | 1 | $30 | $30 |
| 1404 or 1507 class 3-inch brushless motor, kV matched to your pack and propBuy four. Use the motor maker's data. Typical $10-18, no verified link.Amazon (search) | 4 | $14 | $56 |
| SpeedyBee F405 V4 BLS 30x30 stack (F405 FC + 55A 4-in-1 ESC)This stack is an FC plus a 4-in-1 ESC together. Price seen ~$86.49 on RaceDayQuads, Nov 12, 2026. Price seen $86.49 on RaceDayQuads (about 4.8 stars from 45 reviews). 55A is more ESC than a 3-inch usually needs, but it is a current, documented Betaflight stack. Amazon had listings, including some unavailable.RaceDayQuads · price seen on 2026-11-12 | 1 | $86.49 | $86.49 |
| 3-inch props, pack, in the size the motor maker suggestsBuy spares. Typical $6-12, no verified link.Amazon (search) | 1 | $8 | $8 |
| RadioMaster RP1 V2 ExpressLRS 2.4 GHz nano receiverThe radio is a separate, often larger, cost if you do not already fly. Typical $18-$25 each (or see pack note). ASIN confirmed. Typical $18-25. Also sold at GetFPV; that page did not show a usable price in our fetch.Amazon | 1 | $22 | $22 |
| Analog FPV camera plus a legal-power VTX, or a digital systemDigital systems cost more. Typical $30-90, no verified link.Amazon (search) | 1 | $50 | $50 |
| 3S or 4S LiPo, often 650-1100 mAh, XT30 or XT60 to match the ESCBuy at least two packs. Weigh the finished aircraft. Typical $15-30, no verified link.Amazon (search) | 2 | $22 | $44 |
| ExpressLRS 2.4 GHz radio transmitter (e.g. RadioMaster Pocket)Skip if you already own an ExpressLRS radio. Typical $60-90, no verified link.Amazon (search) | 1 | $70 | $70 |
| Analog FPV goggles (or goggles matching your digital system)Skip if you already fly FPV. Typical $50-150, no verified link.Amazon (search) | 1 | $80 | $80 |
| Estimated total (parts only) | $446.49 | ||
Typical US prices, checked 2026-11-12. Prices change and multi-packs are often cheaper per piece.
As an Amazon Associate I earn from qualifying purchases. Prices change; check the store.
Filament
TPU (1.75 mm): about 25 g (8.6 m), roughly 2 h of printing.
TPU around 95A for pads and bumpers, 0.4 mm nozzle, 0.2 mm layers, 15-20% infill, slow print speed, usually no supports for simple pads. PLA is fine for a bench stand, not for a crash bumper. The main frame is carbon, not printed.
AI agents you'll use
- Build-list helper: Checks that motor size, kV, prop, ESC current and battery voltage are consistent with the product docs you paste in, and refuses to invent a kV.
- Betaflight helper (ChatGPT, Claude, Gemini or Grok): Walks through official Configurator steps: flash a current official target, assign a UART for ELRS, set motor protocol and check motor direction with props off.
- Safety research helper: Summarizes current US FAA recreational rules, including the 250 g registration threshold, Remote ID and TRUST, and reminds you to confirm on the official FAA site.
Tools
- Soldering iron suitable for XT30 or XT60 and motor leads
- Flux and a helping stand
- Hex drivers for the frame and motor screws
- Smoke stopper or a current-limited bench supply
- Computer with official Betaflight Configurator
- Kitchen scale that reads grams
- LiPo balance charger and a fire-safe bag
What you'll learn
- How a flight controller, 4-in-1 ESC, motors, receiver and video system fit together
- Flashing and configuring official Betaflight with props off
- LiPo handling and a pre-flight checklist
- US rules that depend on the aircraft's ready-to-fly weight
This is a real flying machine, not a toy you power up over a kitchen table. You solder a 3-inch class stack, flash official Betaflight, and fly only where the rules and the surroundings allow it. Printed parts here are TPU pads and bumpers, not the frame.
What you'll build
A 3-inch carbon quad with a 4-in-1 ESC, an F4 or F7 flight controller running official Betaflight, four brushless motors, an ELRS (or similar) receiver, and an FPV camera plus transmitter. All-up weight varies a lot with the battery and camera; you must weigh yours.
A radio transmitter and goggles are required to fly. Both are in the parts list and the upper end of the cost range; skip them if you already fly FPV.
Print the parts
Search Printables or Thingiverse for a TPU pad or camera bumper that matches your frame name, and credit the designer. Print slowly in TPU with the settings above. A PLA bench stand is optional. Do not substitute a printed frame for carbon unless you are following a design that was explicitly made and tested for that.
Wiring
Do not invent a pad map. Use the silkscreen and the official diagram for your exact flight controller and ESC stack.
| Function | Typical connection | Notes | |---|---| | Motors 1-4 | ESC pads M1-M4 | Betaflight motor order is not always "front left first". Set it in Configurator with props off. | | ESC to FC | Stack connector or the links in the stack manual | Follow that manual. | | Receiver | A free UART (TX/RX), at the voltage marked on the FC | ELRS usually needs a UART plus current official receiver firmware. | | Analog camera | CAM / 5 V or VBAT as marked | Match the camera's voltage. | | Analog VTX | VTX pads, plus a UART if you use SmartAudio, Tramp or MSP | Do not key the VTX without an antenna. | | Battery | ESC lead, first time through a smoke stopper | Confirm polarity before you plug in. |
Firmware is official Betaflight, not an Arduino sketch. Flash a current official release for your board target with Betaflight Configurator, props off.
Step-by-step
- Pick a documented 3-inch parts list from a current frame manual or a reputable builder's bill of materials, then confirm motor kV, ESC voltage and prop size against maker data.
- Print TPU pads if you want them. Test-fit the stack, motors and battery before soldering.
- Solder motors, the battery lead, and the receiver, camera and VTX as the FC diagram shows. Strain-relieve antennas. Inspect for solder bridges.
- First power-up through a smoke stopper, no props.
- Flash official Betaflight and complete the Configurator checklist: accelerometer calibration, receiver map, motor protocol, motor direction, failsafe, OSD, conservative rates. Props still off.
- Set a low-voltage warning and confirm that disarm always works.
- Mount props in the correct rotation, weigh the complete aircraft including battery and camera, and write the number down.
- If that weight is more than 250 g, complete FAA registration and Remote ID (in the US) before you fly. Recreational flyers must complete TRUST even if the aircraft is under 250 g. Confirm at https://www.faa.gov/uas.
- Maiden in an open, legal field. Hover briefly, land, and check motor and ESC temperatures carefully.
- Tune later in small steps. Official guides and Blackbox beat random PID pastes. After a crash, inspect bells, screws and the pack before the next flight.
Code
There is no Arduino sketch. Use official Betaflight and its Configurator:
Prompt for the Betaflight helper:
List the current official Betaflight Configurator steps to flash a supported F4 or F7 board, assign a UART for an ELRS receiver, set a DShot motor protocol, check motor direction with props off, and set failsafe and a low-voltage warning.
Do not give me a random CLI dump or invented PID values. Tell me to confirm the board target and pad map in my flight controller's official documentation.
Troubleshooting
- Smoke stopper trips: unplug immediately and look for a solder bridge, a reversed pack connector, or a motor wire shorted to the frame.
- Motors spin the wrong way: reverse the motor in Configurator or swap two motor leads, props still off.
- No receiver in the Receiver tab: wrong UART, inverted/uninverted mismatch, or the receiver is not flashed for your packet rate.
- Video but no control, or the other way around: you are not ready to fly. Fix both on the bench with props off.
Files, code and docs
- Betaflight firmware (official repository) (GPL-3.0)
- Betaflight project site (Vendor docs)
- FAA Unmanned Aircraft Systems (Vendor docs)
Last checked 2026-11-12. Double-check parts against your own board and seller listings before you buy.