Tiny ESP32 desk robot with an OLED face
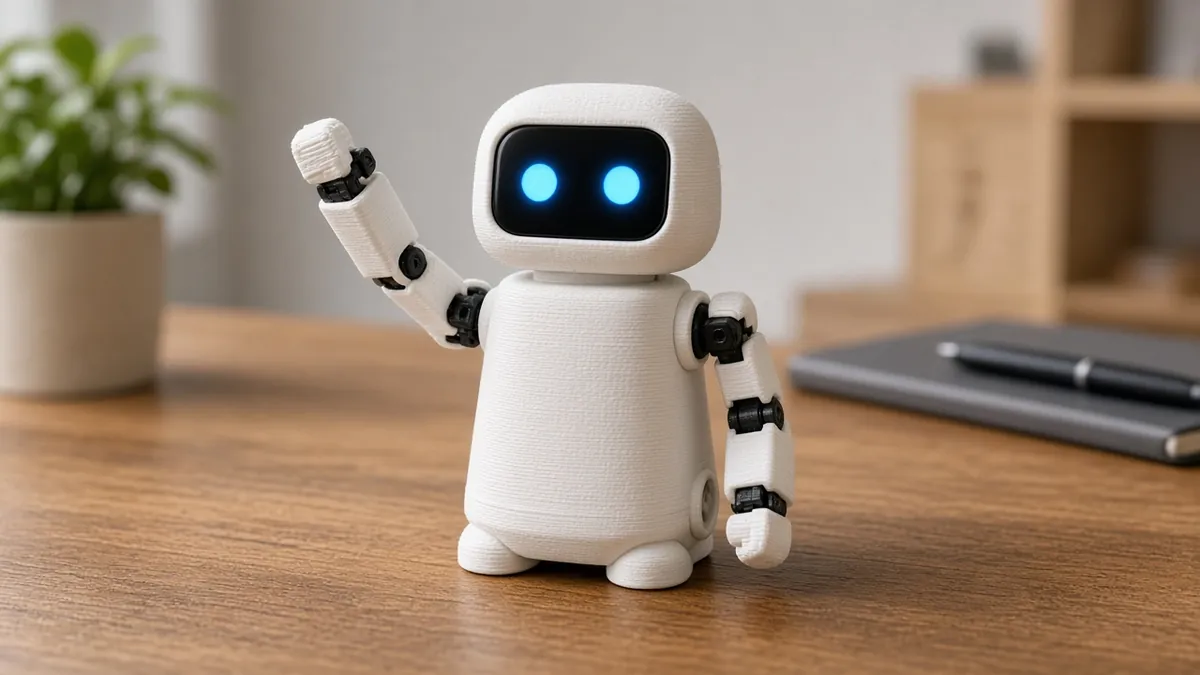
A palm-sized desk buddy with animated eyes on a 0.96-inch OLED that turns its head and waves with two micro servos. A beginner evening build where an AI helper writes and debugs the code with you.
Safety first
- Power it from a USB port or a 5 V USB wall adapter only. Never connect a battery pack above 6 V to the servo lines.
- Unplug USB before you change any wiring.
- Soldering irons and hot glue guns burn. Work on a heat-safe mat and let parts cool.
- Small parts and screws are a choking hazard. Keep the finished toy away from young children.
Parts
| Part | Qty | Approx. each | Subtotal |
|---|---|---|---|
| Espressif ESP32-DevKitC-32E (DevKitC V4) development boardOfficial Espressif 38-pin DevKitC V4 with ESP32-WROOM-32E (4 MB). Micro-USB port, not USB-C. Buy only the official 38-pin Micro-USB board, not a USB-C or 30-pin clone. Primary listing: Mouser 356-ESP32-DEVKITC32E, $10.20, 1,701 in stock on Nov 12, 2026, per Findchips (https://www.findchips.com/search/ESP32-DEVKITC-32E). The Mouser US page itself returned 403 to a direct fetch, so click-confirm the US storefront before you order. Mouser Netherlands listed 1,622 in stock at €8.60 the same day. Do not use DigiKey as the default today (search snippets showed 0 in stock / long lead time). Official Amazon listing https://www.amazon.com/dp/B09MQJWQN2 was still unavailable; use it if it returns. Amazon search for the official board: https://www.amazon.com/s?k=ESP32-DevKitC-32E. Adafruit #3269 remains $15.00 and was out of stock (https://www.adafruit.com/product/3269). Typical $10-16.Mouser · price seen on 2026-11-12 | 1 | $10.20 | $10.20 |
| SG90 9 g micro servo (Beffkkip 5-pack)Plastic-gear SG90s are fine here; the loads are tiny. Price seen ~$1.98 on Amazon, Nov 12, 2026. Price seen $9.88 for a 5-pack (4.4 stars, 1792 reviews in search results).Amazon · price seen on 2026-11-12 | 2 | $1.98 | $3.96 |
| UCTRONICS 0.96-inch SSD1306 OLED, 128x64, I2CPrice seen ~$6.99 on Amazon, Nov 12, 2026. Price seen $6.99 (4.6 stars, 991 reviews in search results).Amazon · price seen on 2026-11-12 | 1 | $6.99 | $6.99 |
| Electrolytic capacitor, 470 uF, 10 V or higherSmooths servo current spikes so the ESP32 does not reset. Typical $0.40-1.00, no verified link.Amazon (search) | 1 | $0.60 | $0.60 |
| 40-pin 20 cm female-to-female jumper wiresTypical $5-$7 each (or see pack note). ASIN confirmed. Typical $5-7 for a 40-wire pack.Amazon | 1 | $5.50 | $5.50 |
| M2 screw assortmentTypical $5-8, no verified link.Amazon (search) | 1 | $6 | $6 |
| Estimated total (parts only) | $33.25 | ||
Typical US prices, checked 2026-11-12. Prices change and multi-packs are often cheaper per piece.
As an Amazon Associate I earn from qualifying purchases. Prices change; check the store.
Filament
PLA (1.75 mm): about 60 g (20.1 m), roughly 5 h of printing.
PLA, 0.4 mm nozzle, 0.2 mm layers, 15% infill, 2-3 walls. Print the head and body shells open side down so they need no supports.
AI agents you'll use
- Code helper (ChatGPT, Claude, Gemini or Grok): Writes and explains the Arduino sketch for the eye animations and servo moves, and fixes the compile errors you paste back in.
- Wiring checker: Compares your pin list against your board's pinout before you plug in USB, and flags pins that are input-only or used at boot.
- CAD helper: Writes OpenSCAD for a simple two-part shell sized to your exact OLED and servos, which you then tweak and print.
Tools
- Soldering iron (optional if you use jumper wires)
- Small Phillips screwdriver
- Wire stripper
- Hot glue gun
- USB data cable (not charge-only)
- A 3D printer or a printing service
What you'll learn
- Driving hobby servos with PWM
- Using an I2C display
- Writing a simple animation loop
- Prompting an AI to write and debug microcontroller code
This little robot sits next to your keyboard, blinks at you with animated eyes, looks left and right, and waves. It uses only three main parts (an ESP32, two micro servos and a tiny OLED screen), so it's a great first robot. You don't need to know how to code: an AI assistant writes the sketch with you, and you learn by asking it to explain each part.
What you'll build
A two-part printed shell about 6 cm wide. One servo turns the head left and right. The other moves a small arm. The OLED sits in the head and draws the eyes. Everything runs from a USB cable.
Print the parts
- Ask your CAD helper agent for an OpenSCAD shell (prompt below), or remix any open-licensed "ESP32 desk robot" design you like and credit its author.
- Measure your OLED board and servos with a ruler first. Sizes vary a little between sellers.
- Print the head, body and arm with the settings above. Expect roughly 50-60 g of PLA in total.
Prompt for the CAD helper:
Write OpenSCAD for a two-part desk robot shell. The body holds an ESP32 dev board (measure: __ x __ mm) and one SG90 servo
mounted vertically so its horn turns the head. The head is a box with a window for a 0.96" OLED module (board __ x __ mm,
screen area __ x __ mm) and a side mount for a second SG90 that moves an arm. 2 mm walls, M2 screw holes, a slot for the USB cable.
Use variables for every measurement so I can adjust them.
Wiring
| From | To (ESP32) |
|---|---|
| OLED VCC | 3V3 |
| OLED GND | GND |
| OLED SDA | GPIO 21 |
| OLED SCL | GPIO 22 |
| Head servo signal (orange) | GPIO 18 |
| Arm servo signal (orange) | GPIO 19 |
| Both servo power (red) | 5V (labelled 5V or VIN on most boards) |
| Both servo ground (brown) | GND |
| 470 µF capacitor | across servo 5V and GND, long leg (+) to 5V |
Pin labels differ between ESP32 boards. Paste your board's pinout into the wiring checker agent before you power up.
Step-by-step
- Install the Arduino IDE, then the ESP32 board package (see the Espressif link above).
- In Library Manager, install Adafruit SSD1306, Adafruit GFX Library and ESP32Servo.
- Test the screen alone first: wire only the OLED and run the Adafruit "ssd1306_128x64_i2c" example. Most of these modules use I2C address 0x3C.
- Wire one servo and ask your code helper for a sketch that sweeps it from 30° to 150°. Keep the head servo inside that range so it never strains against the shell.
- Add the second servo and the capacitor.
- Ask the code helper for the full sketch (prompt below). Upload it and fix any errors by pasting them back into the chat.
- Center both servos (90°) before you fit the horns, then screw the head and arm on.
- Close the shell with M2 screws. Use a dab of hot glue only where nothing will need to come apart.
Code
Prompt for the code helper:
Write an Arduino sketch for an ESP32 using ESP32Servo and Adafruit_SSD1306 (128x64, I2C address 0x3C, SDA 21, SCL 22).
Head servo on GPIO 18 (keep it between 30 and 150 degrees), arm servo on GPIO 19.
Draw two rounded-rectangle eyes that blink at random every 2-6 seconds. Every 10-20 seconds, look left or right
by turning the head and shifting the eyes the same way, then sometimes wave the arm. Use millis(), not long delay() calls.
Explain each section in comments for a beginner.
Here is the shape of the servo part, so you can check what the AI gives you:
#include <ESP32Servo.h>
Servo head;
void setup() { head.attach(18); head.write(90); }   // 90 = looking straight ahead
void loop()  { head.write(60); delay(800); head.write(120); delay(800); }
Troubleshooting
- The board resets when a servo moves: check the capacitor, use a better USB cable or a 2 A USB adapter, and don't let a servo push against the shell.
- Blank screen: check SDA and SCL aren't swapped, and run an I2C scanner sketch to confirm the address.
- Upload fails: some boards need you to hold the BOOT button while "Connecting..." shows.
- Servo jitters: make sure the servo ground and ESP32 ground are connected together.
Files, code and docs
Last checked 2026-11-12. Double-check parts against your own board and seller listings before you buy.